AI Assistant
For more details please have a look at the AI integration documentation.
Overview
Please have a look at the AI Assistant documentation for more details.
AI Assistant integration setup
Create AI User Group
NOTE: For easier management of AI access we need to create a Usergroup and add the eligible members to it.
| Step | Details | Additional Information |
|---|---|---|
| Click on User Management in the 3 Dots menue in the sidebar |  | |
| Click on the Groups tab in the User Management View |  | |
| Click on Create Group Button to create a new Group |  | |
| Enter a meaningful name for new Group |  | |
| Click on the Add User section |  | |
Select the users by clicking on the  symbol symbol |  | |
| Click the Add Button to add selected Users to Group |  | |
| All Groupmemebers are now listed in Group |  |
Configure AI Integration
Next configure the AI Integration
| Step | Details | Additional Information |
|---|---|---|
| Click on Integrations in the Configuration menue in the sidebar |  | |
| The empty integrations view is shown |  | |
| Click on New Integration Button |  | |
| Enter a meaningful name and select your AI Provider and API Key |  | |
| Press Next Button to enter more Details |  | |
| Next dialog page opens |  | |
| Enter API Endpoint if missing | https://api.openai.com/v1/chat/completions | |
| Select your prefered model |  | |
| Set your prefered LLM settings for temperature and more |  | |
| Click on Save |  | |
| The new AI integration is created but no Groups are associated |  | |
| Press the Add Groups Button under Actions Column |  | |
| Select the new Group you created from above and additional ones you need |  | |
| Click on ADD Button to save selection |  | |
| Updated View |  |
Activate member access
Last step is for every enabled user (from selected groups) is to activate the access
| Step | Details | Additional Information |
|---|---|---|
| Click on your Profile Icon in the Sidebar and select Member Access |  | |
| A list of integrations available for Member access is shown and their status |  | |
| Click on the Integrationname to activate access |  |
Using the Plan AI Assistant
AI Assistant Chat Dialog
| Step | Details | Additional Information |
|---|---|---|
| 1 | Select the AI Assistant Icon |  |
| 2 | Accept the terms of service ! | 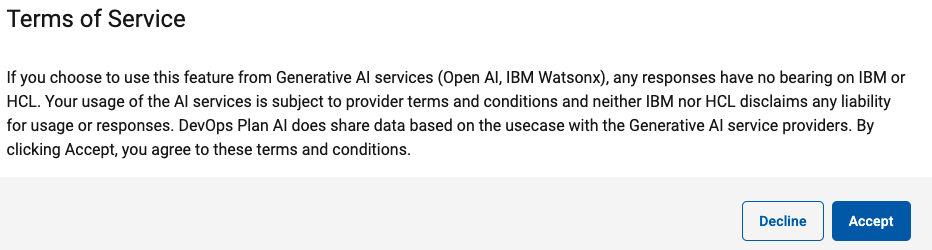 |
| 3 | The AI Assistant Chat Dialog opens | 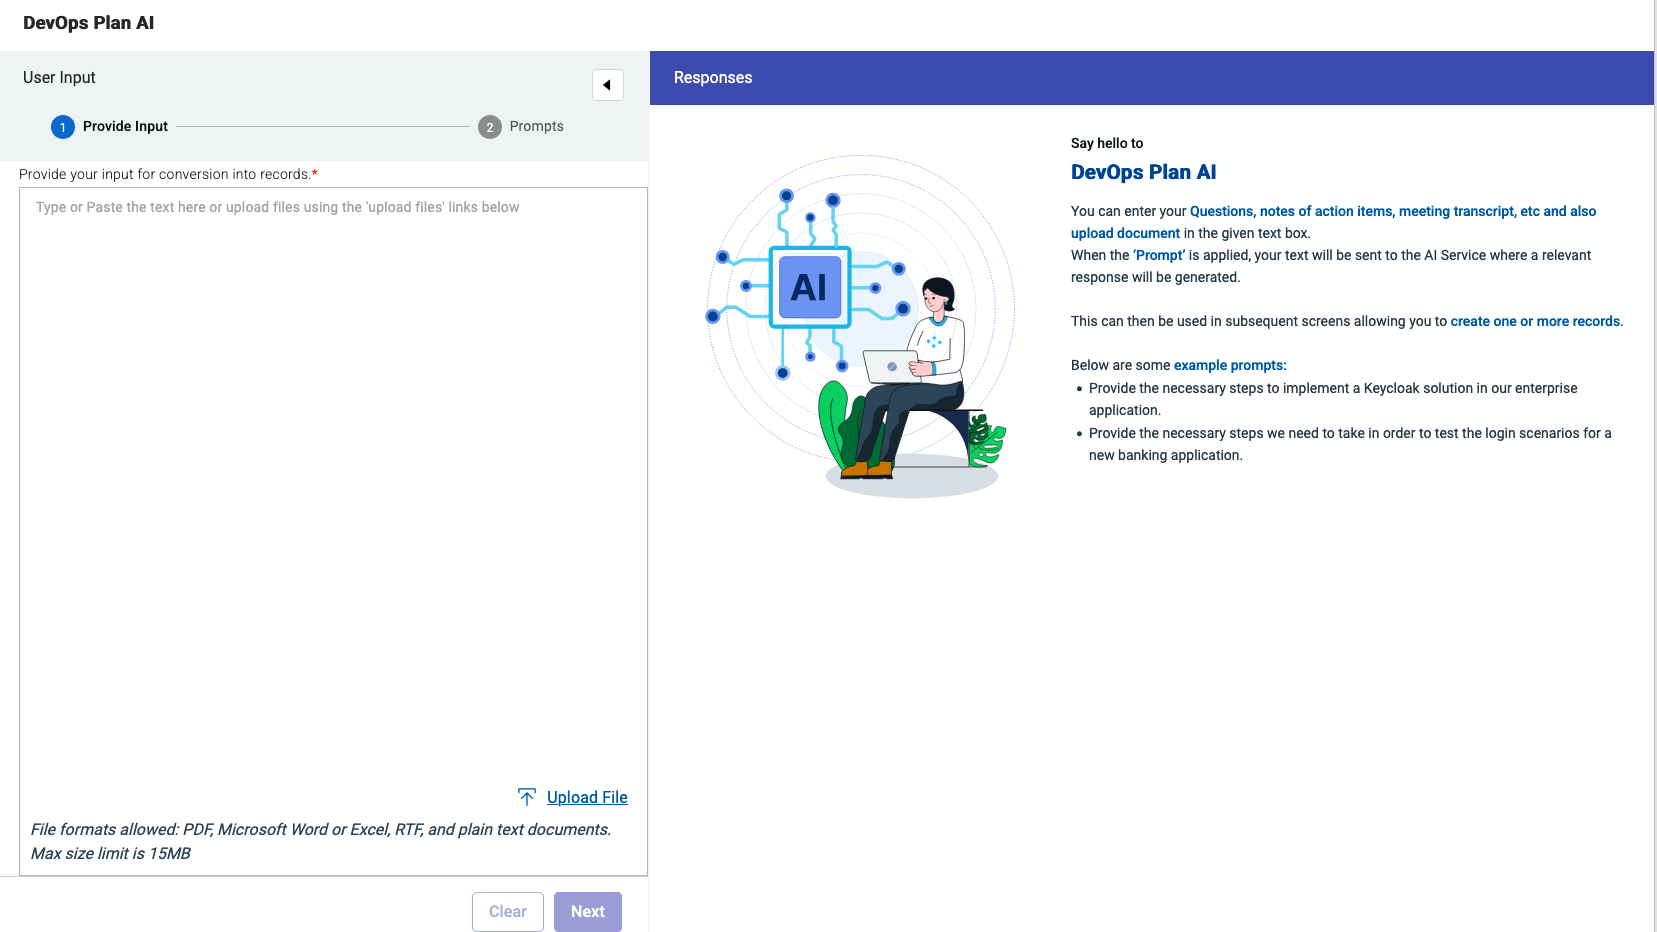 |
| 4 | Enter Now a prompt, you can use the example prompts, or enter your prompt | 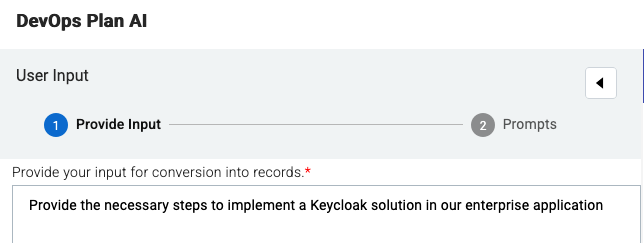 |
| 5 | Click on the Next Button | |
AI Assistant Type of Output
| Step | Details | Additional Information |
|---|---|---|
| 1 | Now select the type of Output: | |
| 2 | We will select Generate Action Items 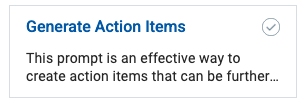 from the Applying Prompts page | 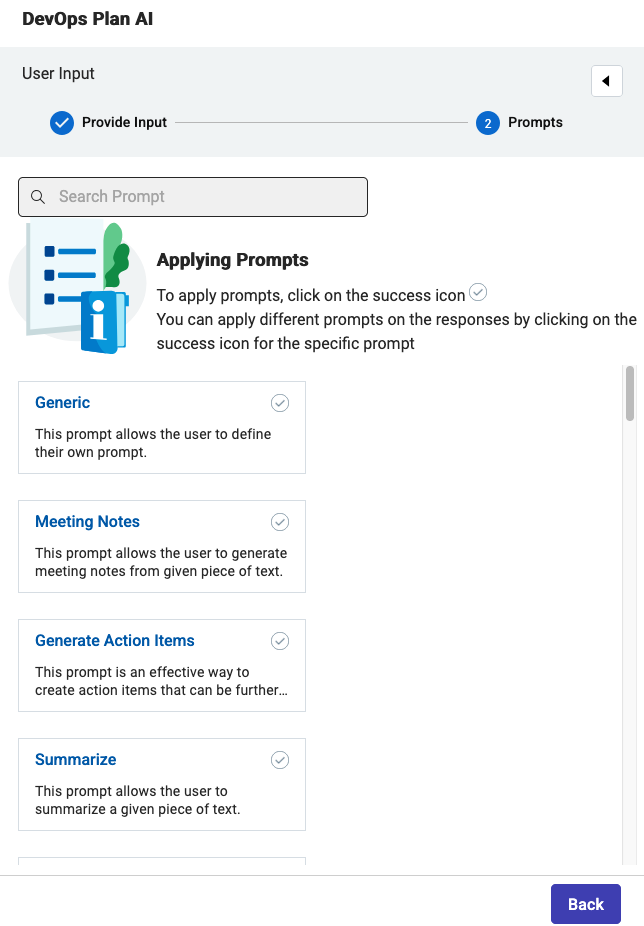 |
| 3 | This will generate a set of responses | 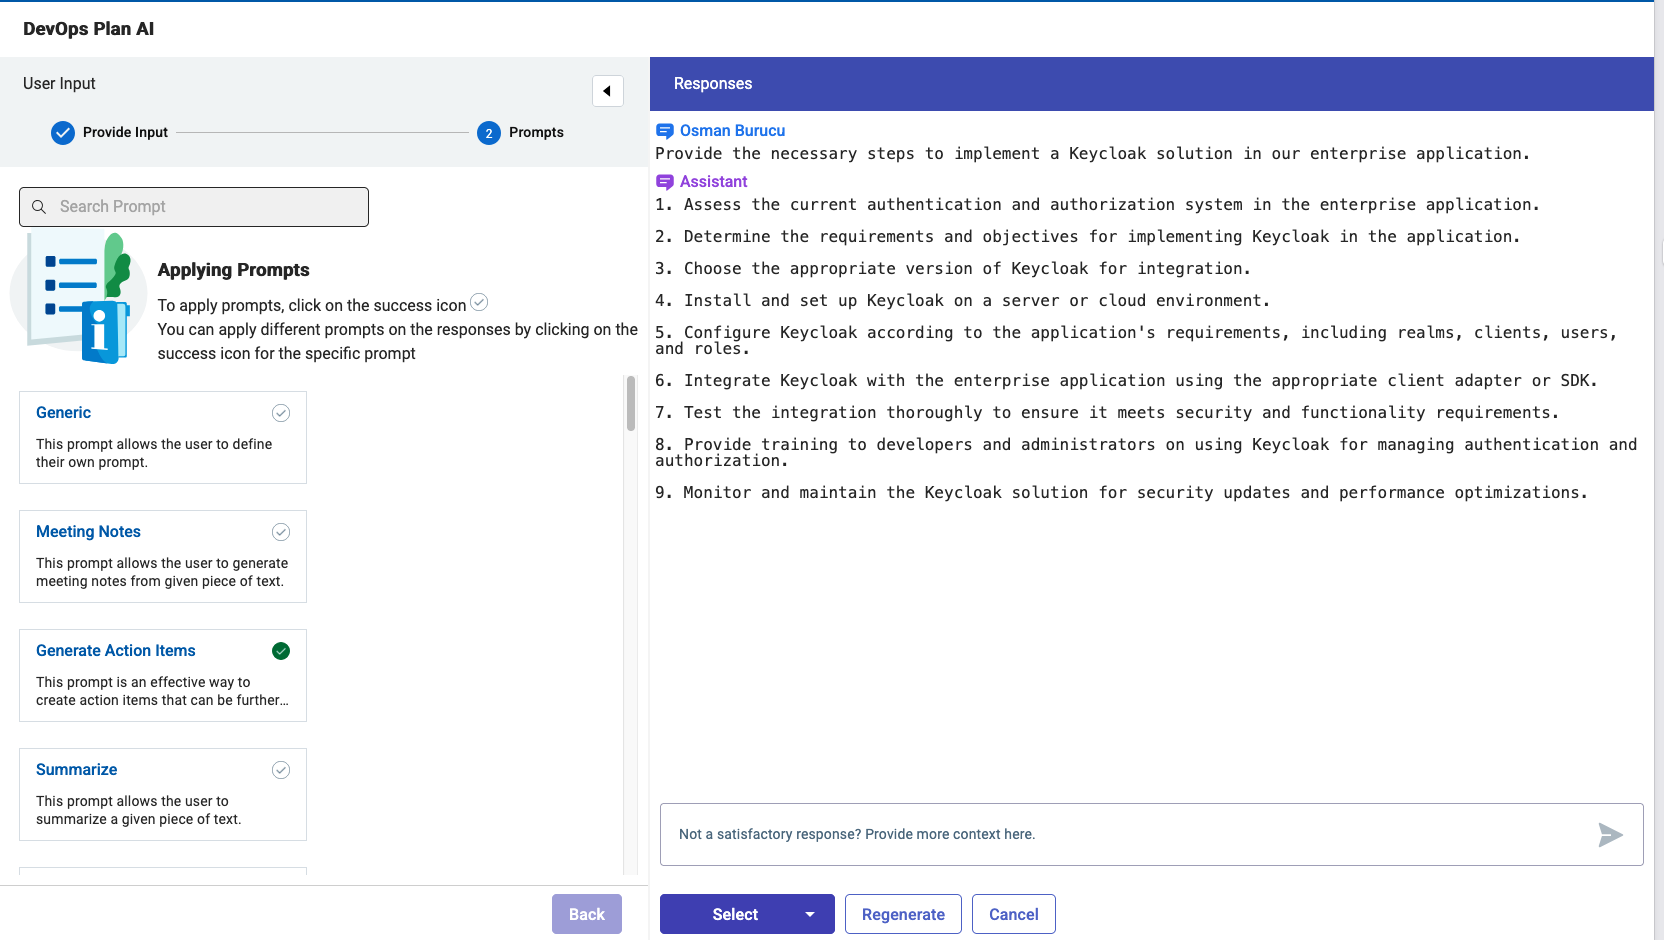 |
| 4 | Click the Select Button and select Break Down into Titles | 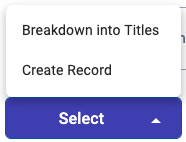 |
| 5 | This will convert the list of responses to a list with checkboxes: | 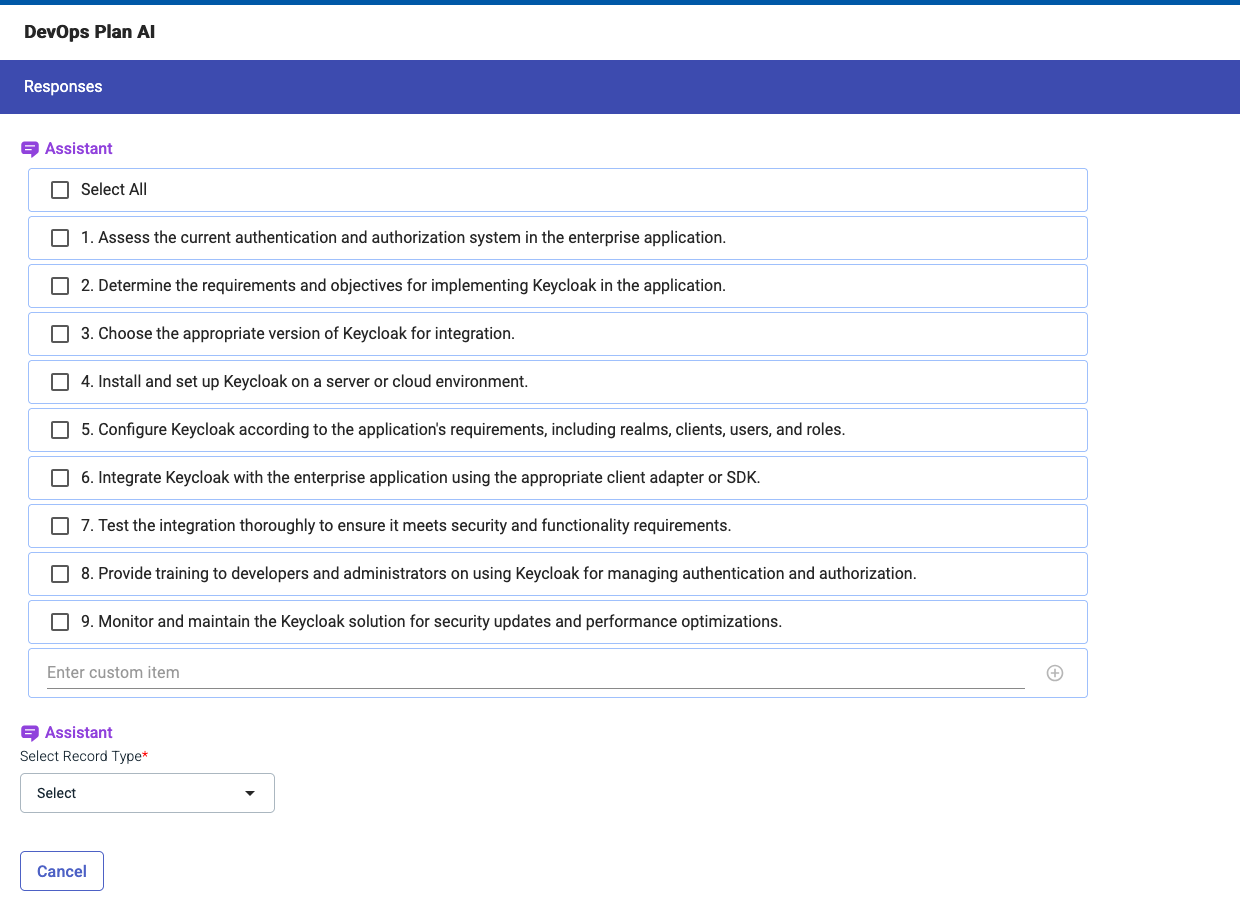 |
| 6 | Select a few you like from the list | 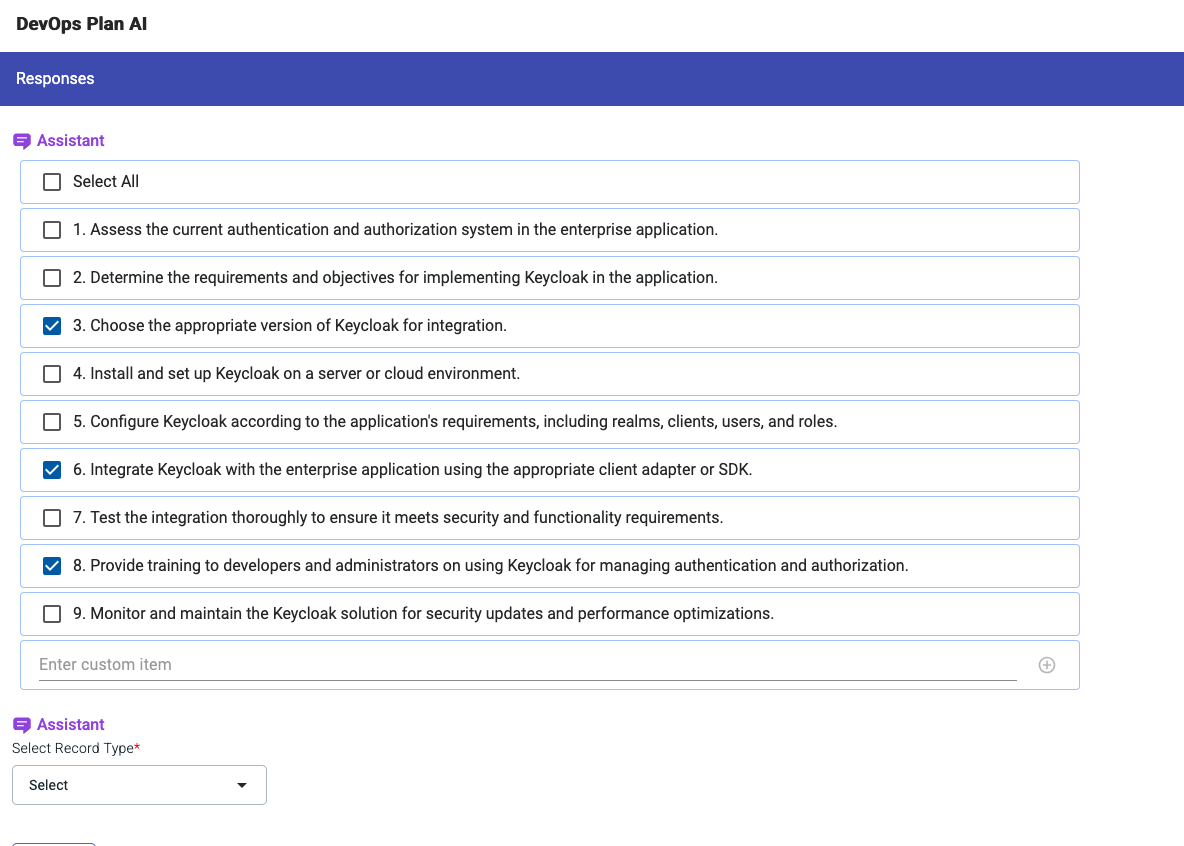 |
AI Assistant Create Records from Responses
| Step | Details | Additional Information |
|---|---|---|
| Click the Select Record Type Button | 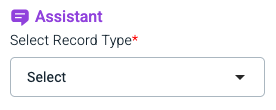 | |
| to select Workitem from the list |  | |
| In the next Dialog select the right Project and Workitem Type |  | |
| for example Project: Echologic and Type: Epic | 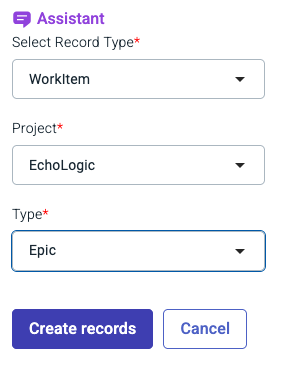 | |
| Press the Create Records Button to get the Epics created |  | |
| A few seconds later all newly created records are now created | 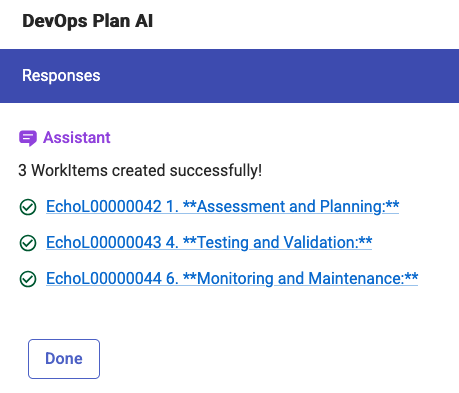 | |
| Press Done to finish using the AI Assistant |  |